
Blender 2.8 Tips and Tricks
Below follows a collection of shaders, addons and general tips that I like to use when modeling and shading.
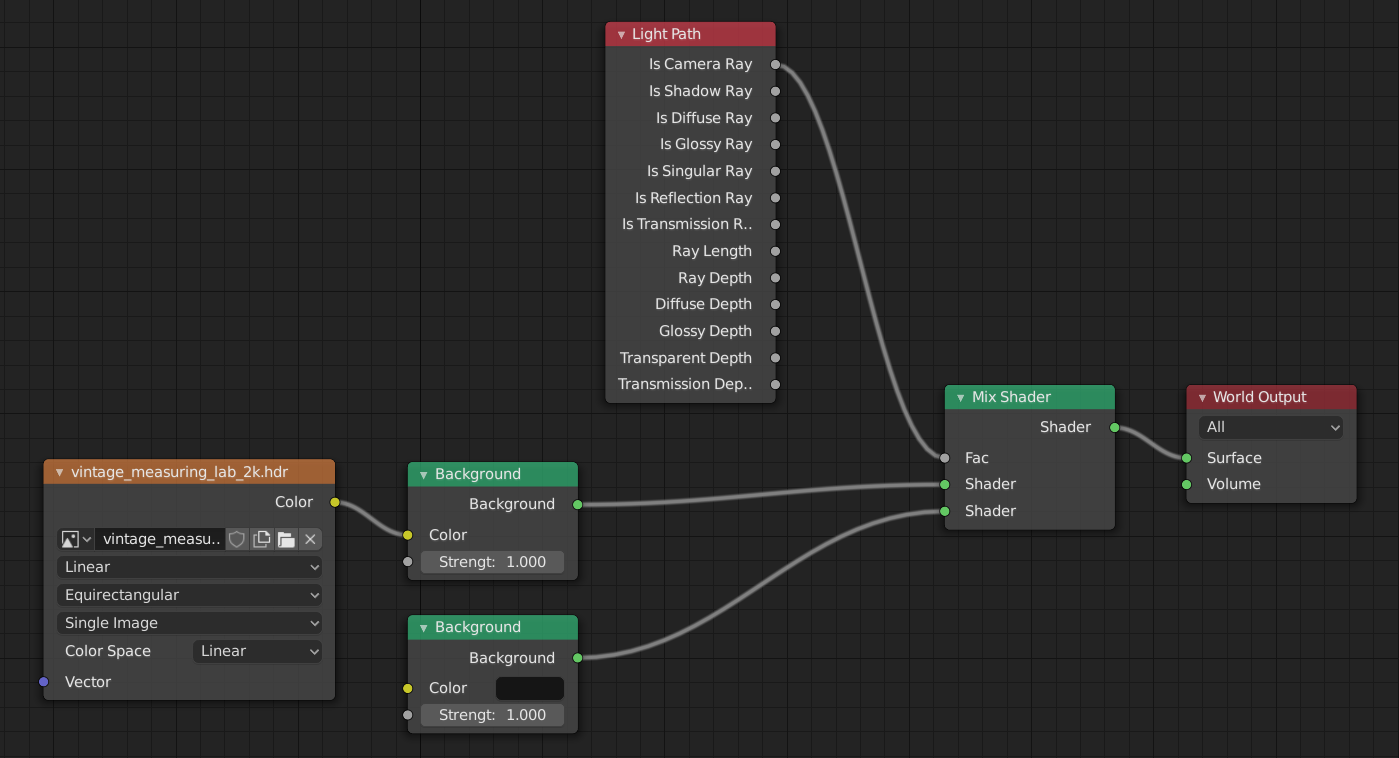
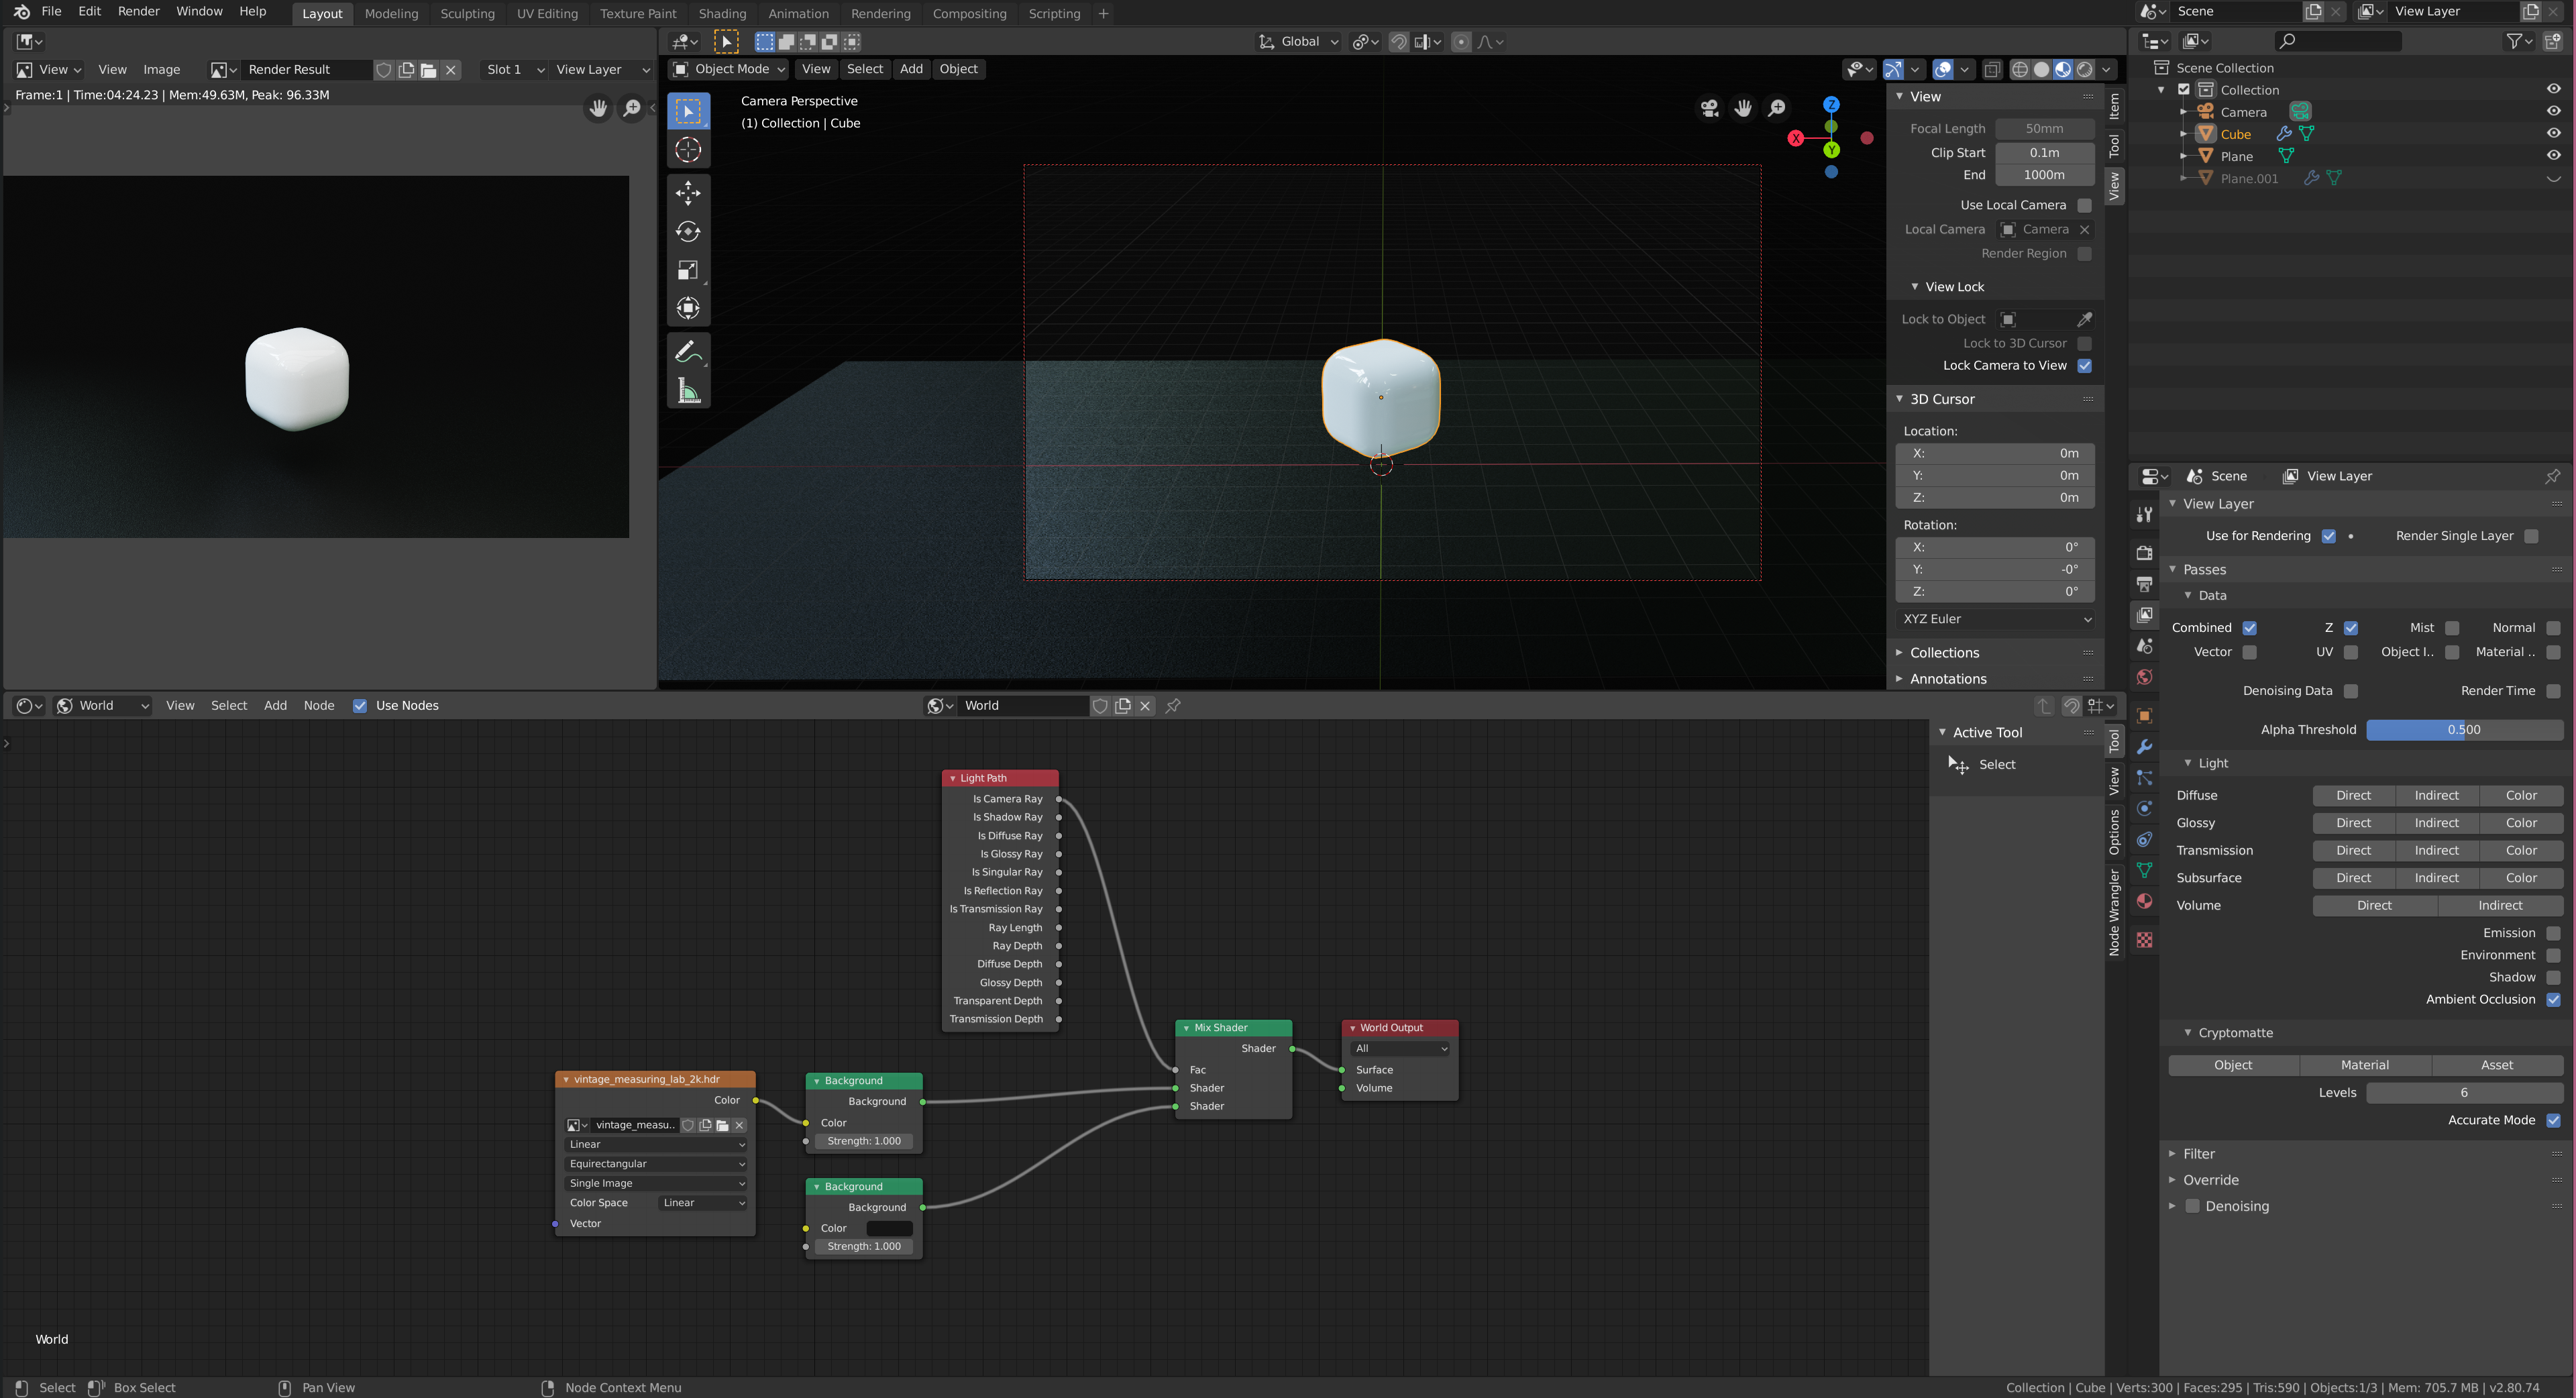
Use Environment Map only for Reflections
When creating a product visualisation, you might want to use an
environment-map for your lighting. When you want to render you
scene into an image with a solid background and still make use
of an environment map, you have to use a transparent node with
you world material. You use a Light Path node and select the
Is Camera Ray and connect that to the factor input of the
Mix Shader. See the shader setup in the image below which
allows you to use an environment map for reflections and renders
a solid color in the background.
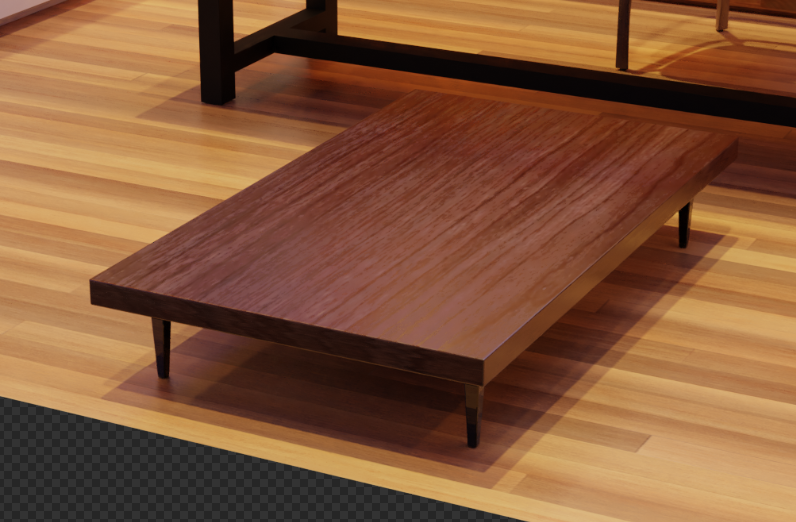
Floor Plane for a Product Display
When you're creating a product visualisation where you want to
render only the product, it's good practice to render the product
onto a ground plane. Note that you can combine this method with
the Use Environment Map only for Reflections shader setup as
described above.
With this shader, you fade a plane using the generated texture
coordinates. Note that you need to make sure you fade along the
desired axis. I'm rotating the texture coordinates by 90 degrees
and then scale along the x-axis. Also make sure that you use
easing for the Gradient Texture.
![]()
![]()
See this StackOverflow where this technique is described.
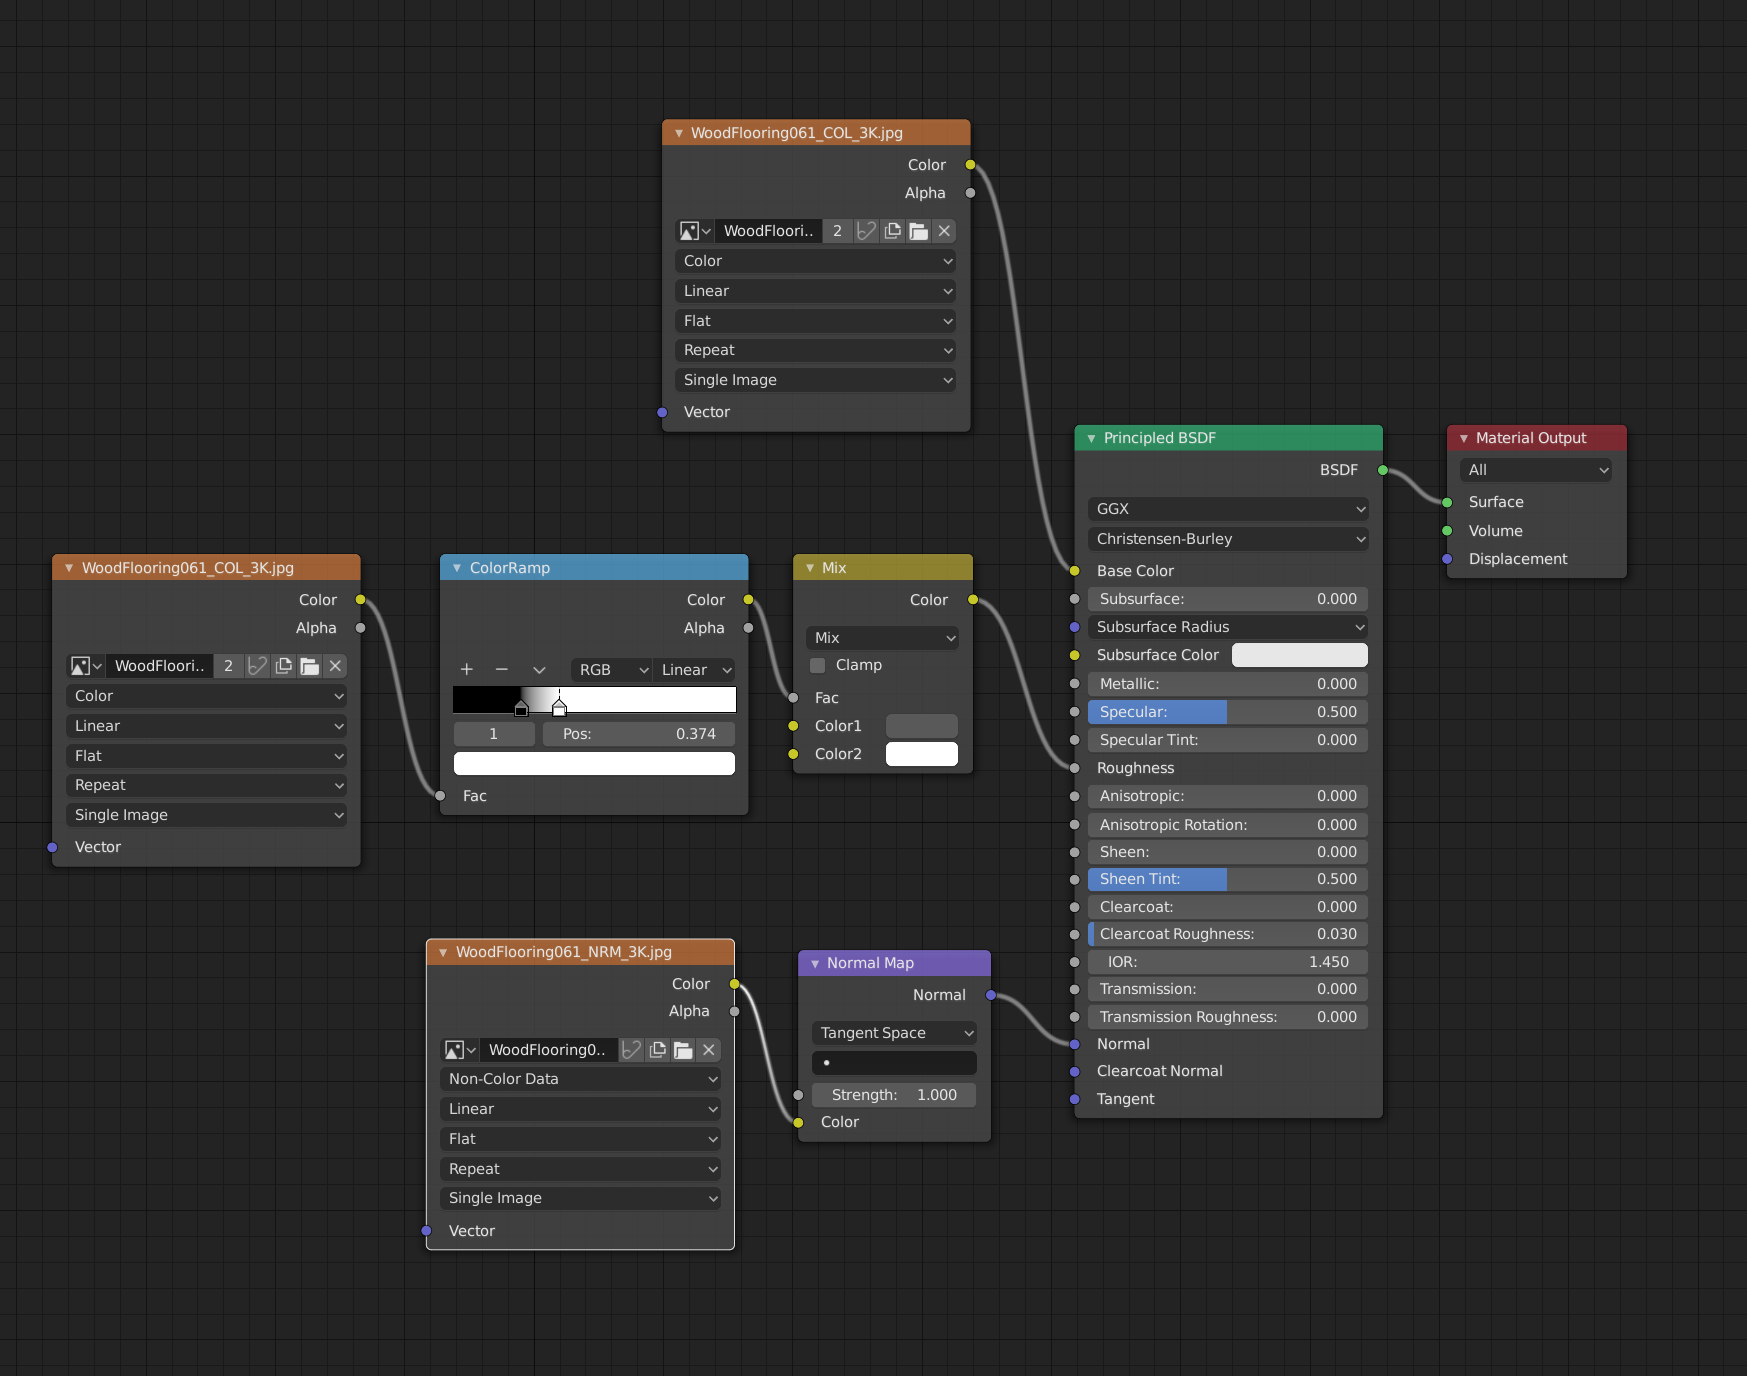
Diffuse texture for roughness
I found this shader setup in the You Say Armchair .blend file that you can download from blendswap. The model is created by piergi. The nice thing here, is that we use the diffuse texture directly for our roughness, so we don't need an extra texture and works perfectly.
You connect the diffuse texture to a ColorRamp. This
ColorRamp influences what range of colors you want to use for
the roughness. Next, you connect the ColorRamp to a Mix RGB
node. You use this MixRGB node to set the strength of the
roughness by making the color darker or brigher.

Transparent material
This material fades away based on the Z-height. This shader is
based on this one from Blender
Artists.
You take the generated UV as input and attach it to a Mapping
node. The Mapping node allows you to offset where we should
start fading away. To access the z value from the UV, we use a
separate RGB. The value ranges from 0-1. We use a ColorRamp to
flip this so that we have a range from 1-0 (1.0 at the bottom,
0.0 at the top). We then mix a transparent and emission node using
the output of the ColorRamp.
- Use the
Location.zof theMappingnode to change the offset for the effect. - Use the
ColorRampto influence the falloff.
![]()
![]()
We can add a Noise Texture to create a more dynamic shape. A
RGB Curves allows us to tweak the fallof a bit more.
![]()
![]()
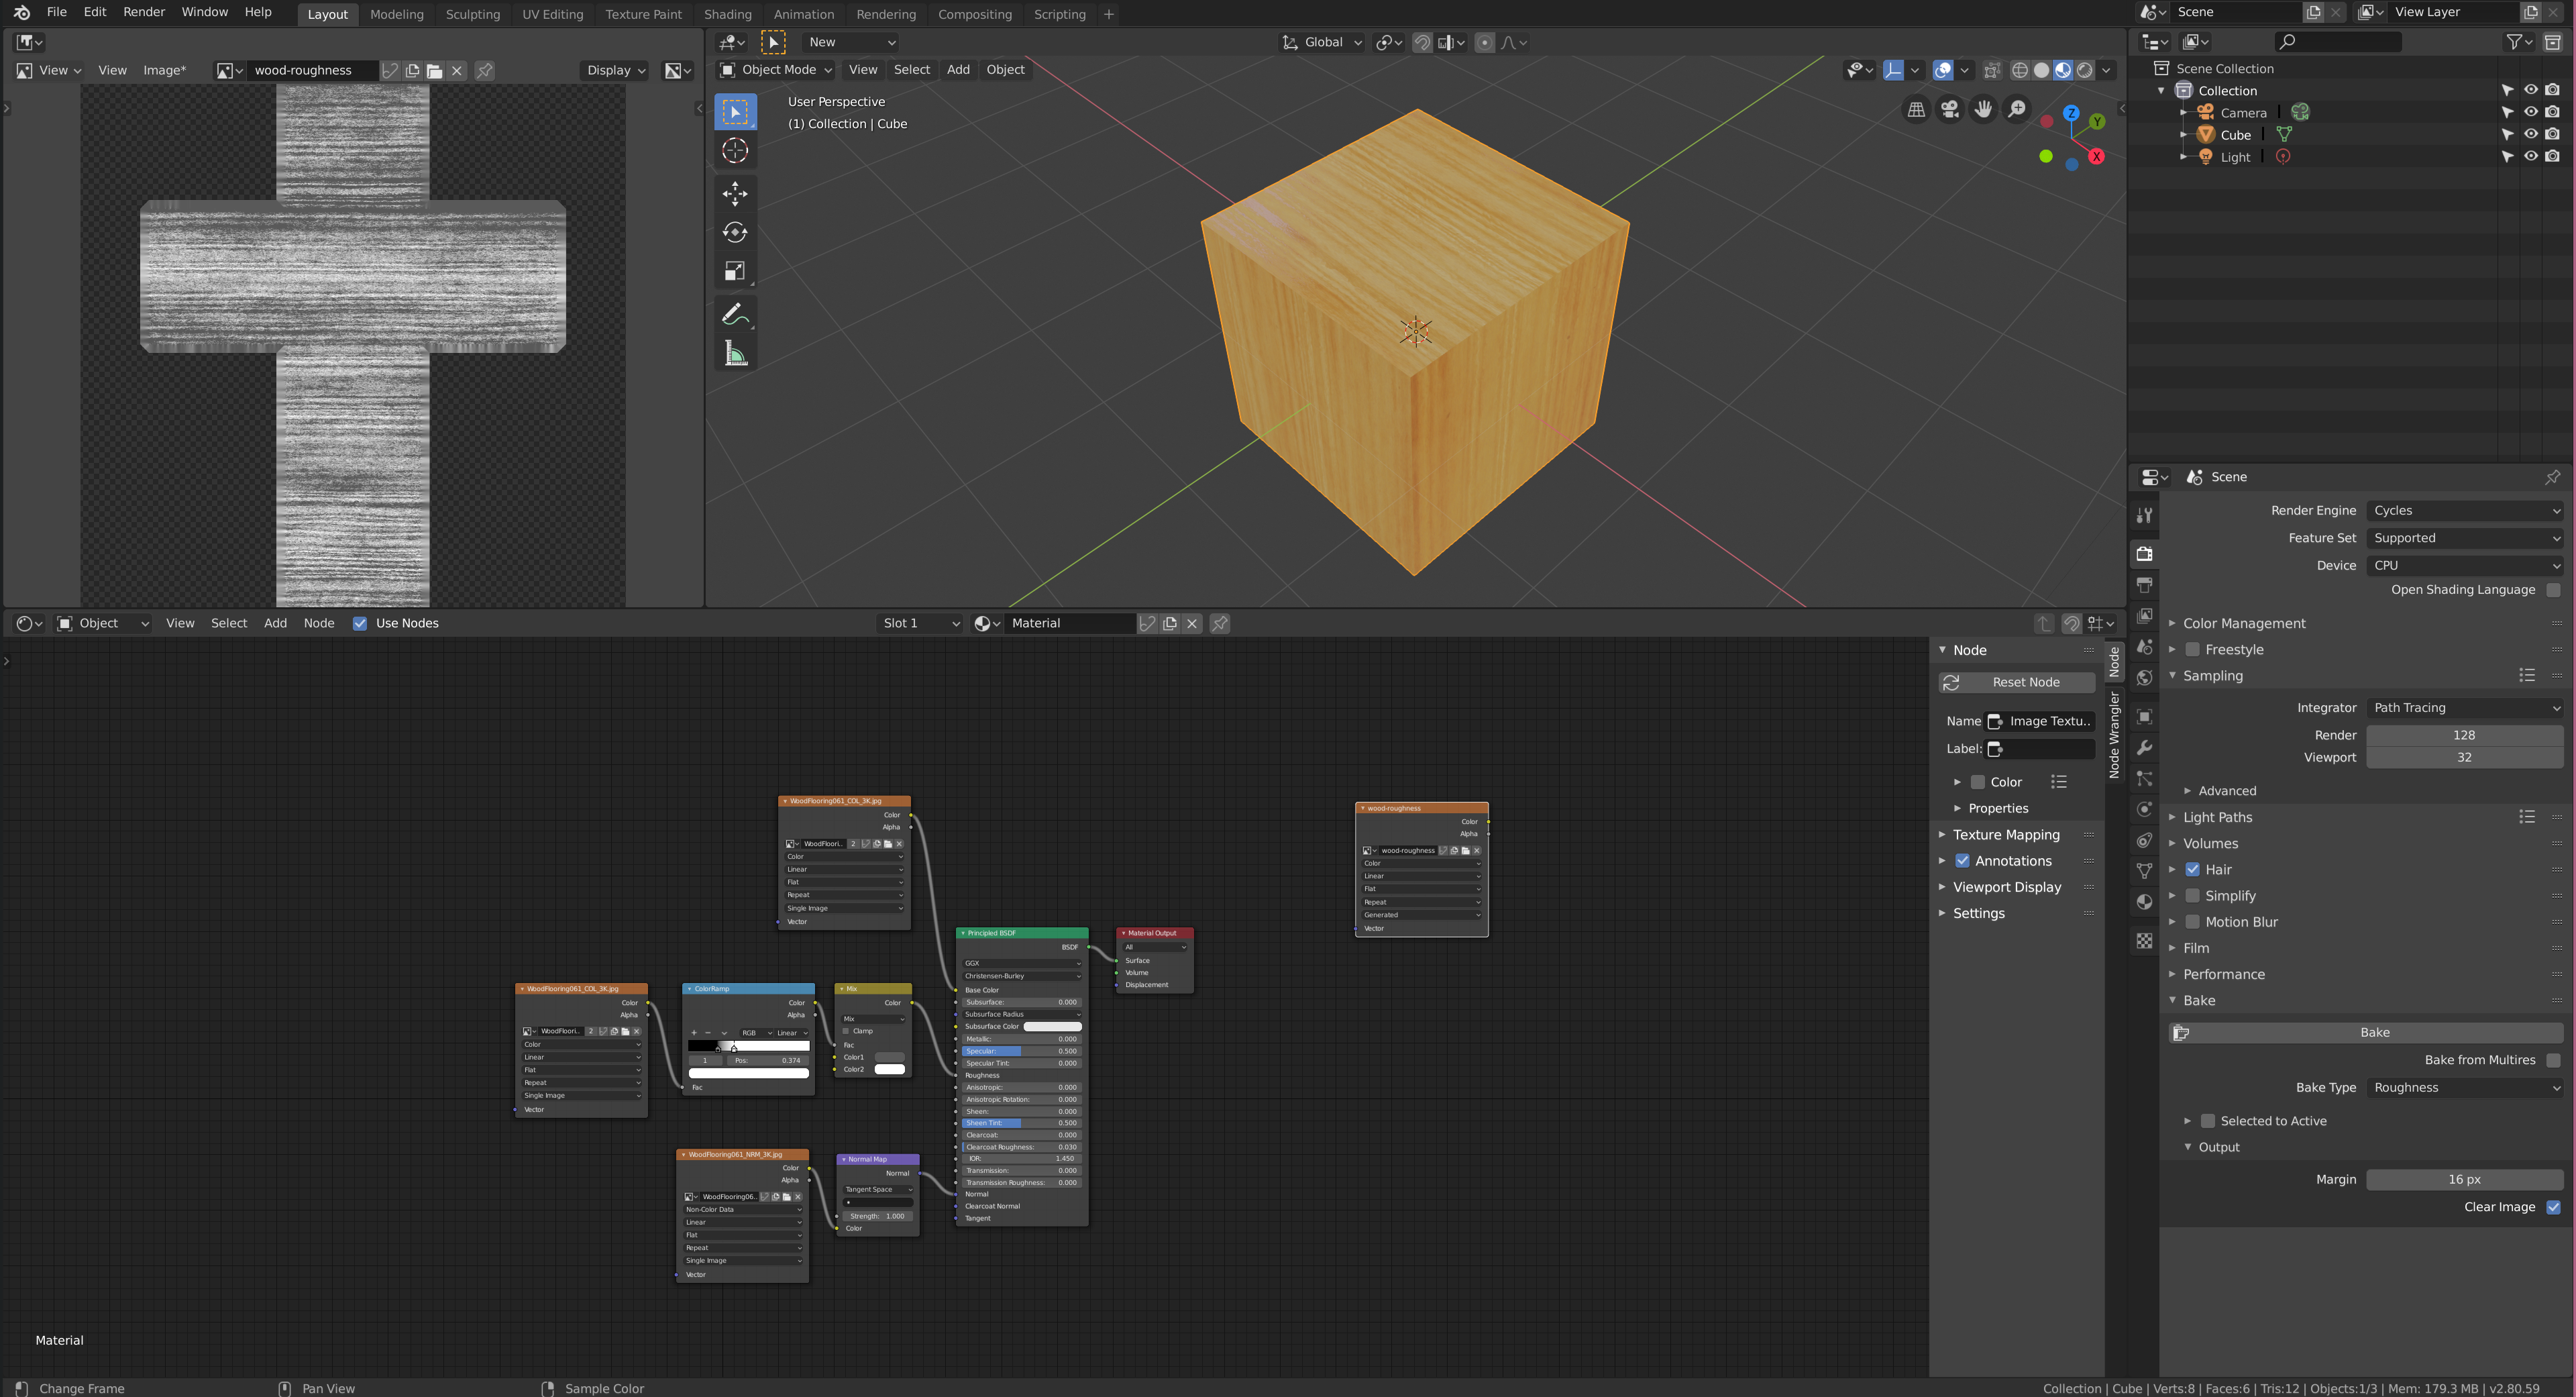
Texture Baking
I've got a renderer that uses a separate texture for roughness. Below I'll show you how to bake the roughness into a .png file. Let's say you've got this node setup:
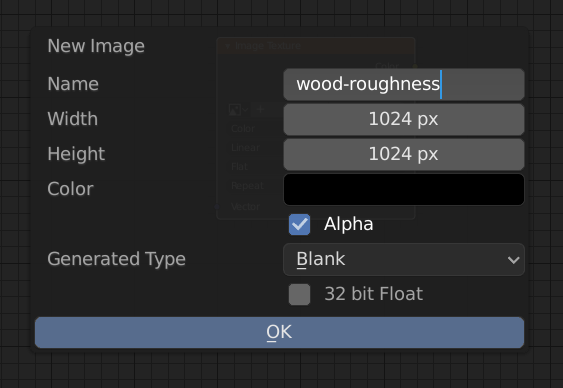
A simple way to bake textures is to create a new separate
image node in the shader editor and make sure it's selected.
You add the image node, then press the New button.
Now, make sure that this node is active and make sure that
your are using the Cycles render engine. Open your Render
tab, scroll to the Bake section. For the Bake type
select Roughness and press the Bake button.
Then you can open an image pane and save the generated
roughness map.
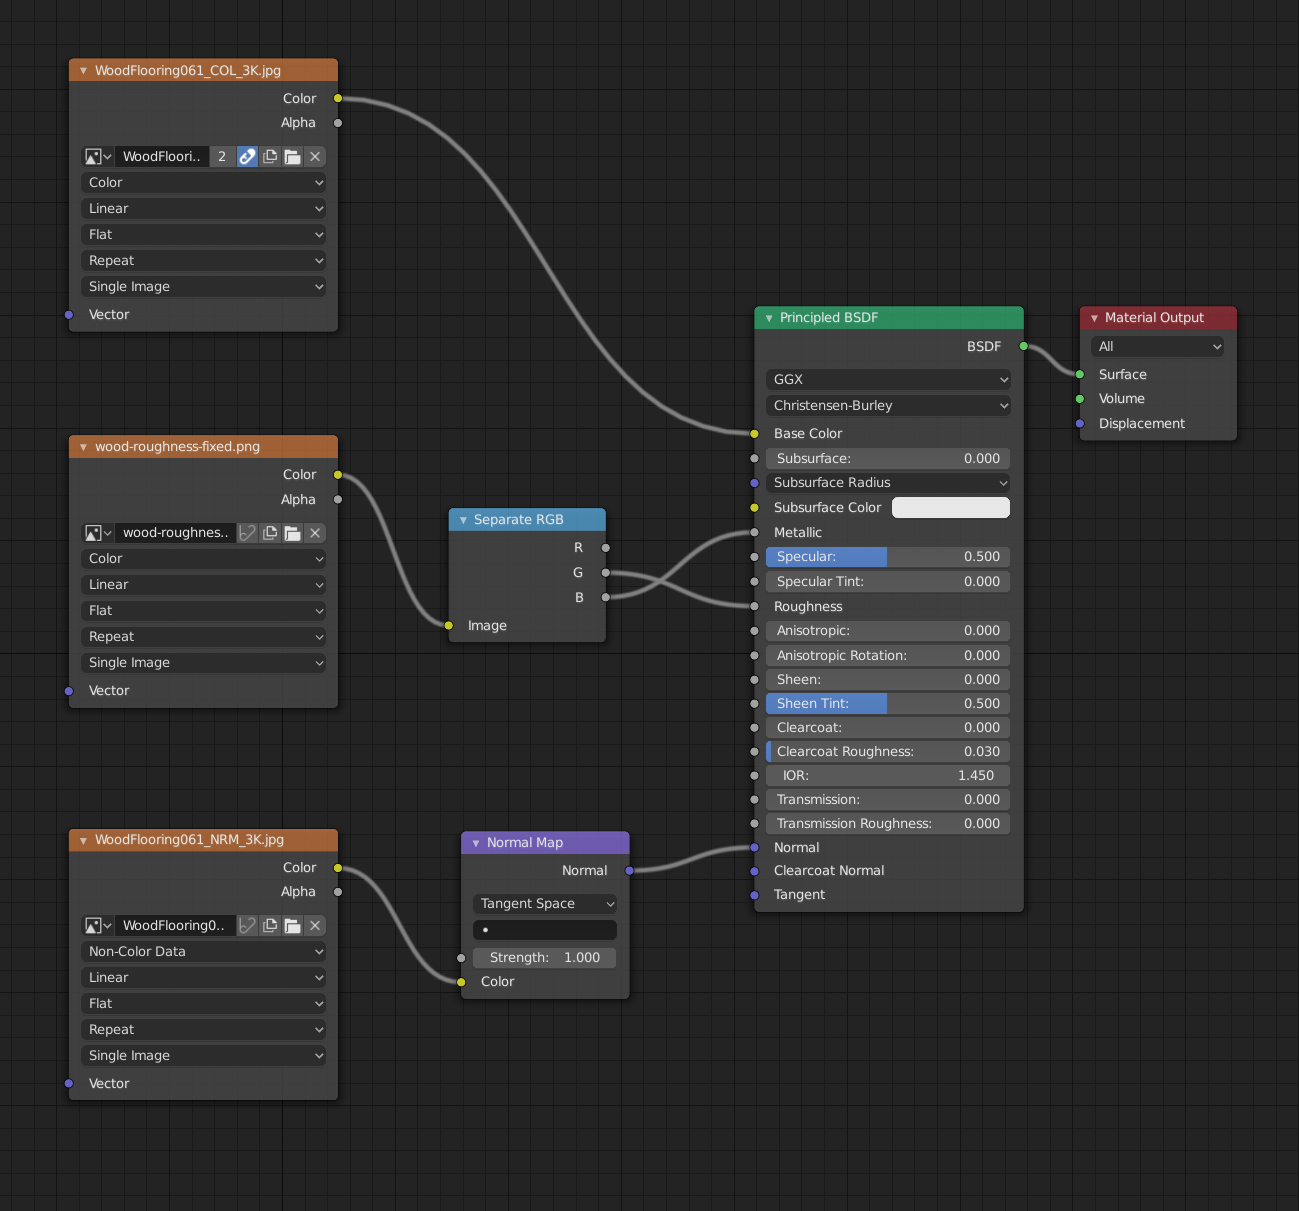
Export to GLTF using Principled BSDF Shader
GLTF and Blender use these channels:
- Occlusion = R
- Metallic = B
- Roughness = G
Use this node setup:
 NAT Types
 Building Cabinets
 Compiling GStreamer from source on Windows
 Debugging CMake Issues
 Dual Boot Arch Linux and Windows 10
 Mindset Updated Edition, Carol S. Dweck (Book Notes)
 How to setup a self-hosted Unifi NVR with Arch Linux
 Blender 2.8 How to use Transparent Textures
 Compiling FFmpeg with X264 on Windows 10 using MSVC
 Blender 2.8 OpenGL Buffer Exporter
 Blender 2.8 Baking lightmaps
 Blender 2.8 Tips and Tricks
 Setting up a Bluetooth Headset on Arch Linux
 Compiling x264 on Windows with MSVC
 C/C++ Snippets
 Reading Chunks from a Buffer
 Handy Bash Commands
 Building a zero copy parser
 Kalman Filter
 Saving pixel data using libpng
 Compile Apache, PHP and MySQL on Mac 10.10
 Fast Pixel Transfers with Pixel Buffer Objects
 High Resolution Timer function in C/C++
 Rendering text with Pango, Cairo and Freetype
 Fast OpenGL blur shader
 Spherical Environment Mapping with OpenGL
 Using OpenSSL with memory BIOs
 Attributeless Vertex Shader with OpenGL
 Circular Image Selector
 Decoding H264 and YUV420P playback
 Fast Fourier Transform
 OpenGL Rim Shader
 Rendering The Depth Buffer
 Delaunay Triangulation
 RapidXML
 Git Snippets
 Basic Shading With OpenGL
 Open Source Libraries For Creative Coding
 Bouncing particle effect
 OpenGL Instanced Rendering
 Mapping a texture on a disc
 Download HTML page using CURL
 Height Field Simulation on GPU
 OpenCV
 Some notes on OpenGL
 Math
Math
 Gists to remember
 Reverse SSH
 Working Set
 Consumer + Producer model with libuv
 Parsing binary data
 C++ file operation snippets
 Importance of blur with image gradients
 Real-time oil painting with openGL
 x264 encoder
 Generative helix with openGL
 Mini test with vector field
 Protractor gesture recognizer
 Hair simulation
 Some glitch screenshots
 Working on video installation
 Generative meshes
 Converting video/audio using avconv
 Auto start terminal app on mac
 Export blender object to simple file format